Friday, November 7, 2014

Recreating a Vintage Smocked Dress


I got a call about a year ago (yes, I'm just now writing about it) to recreate a vintage smocked dress from the 50's.  The most interesting part about the recreated dress....it was to be used as a costume on the broadway stage!


I was asked not to mention the name of the production due to copyright infringement, however, just think Southern...None of the costume seamstresses knew how to smock!  The costume designer browsed through Etsy and found my newly opened shop and the rest is history!  I received a package containing the dress and enough silk taffeta and floss to complete the insert for a size 5 dress.
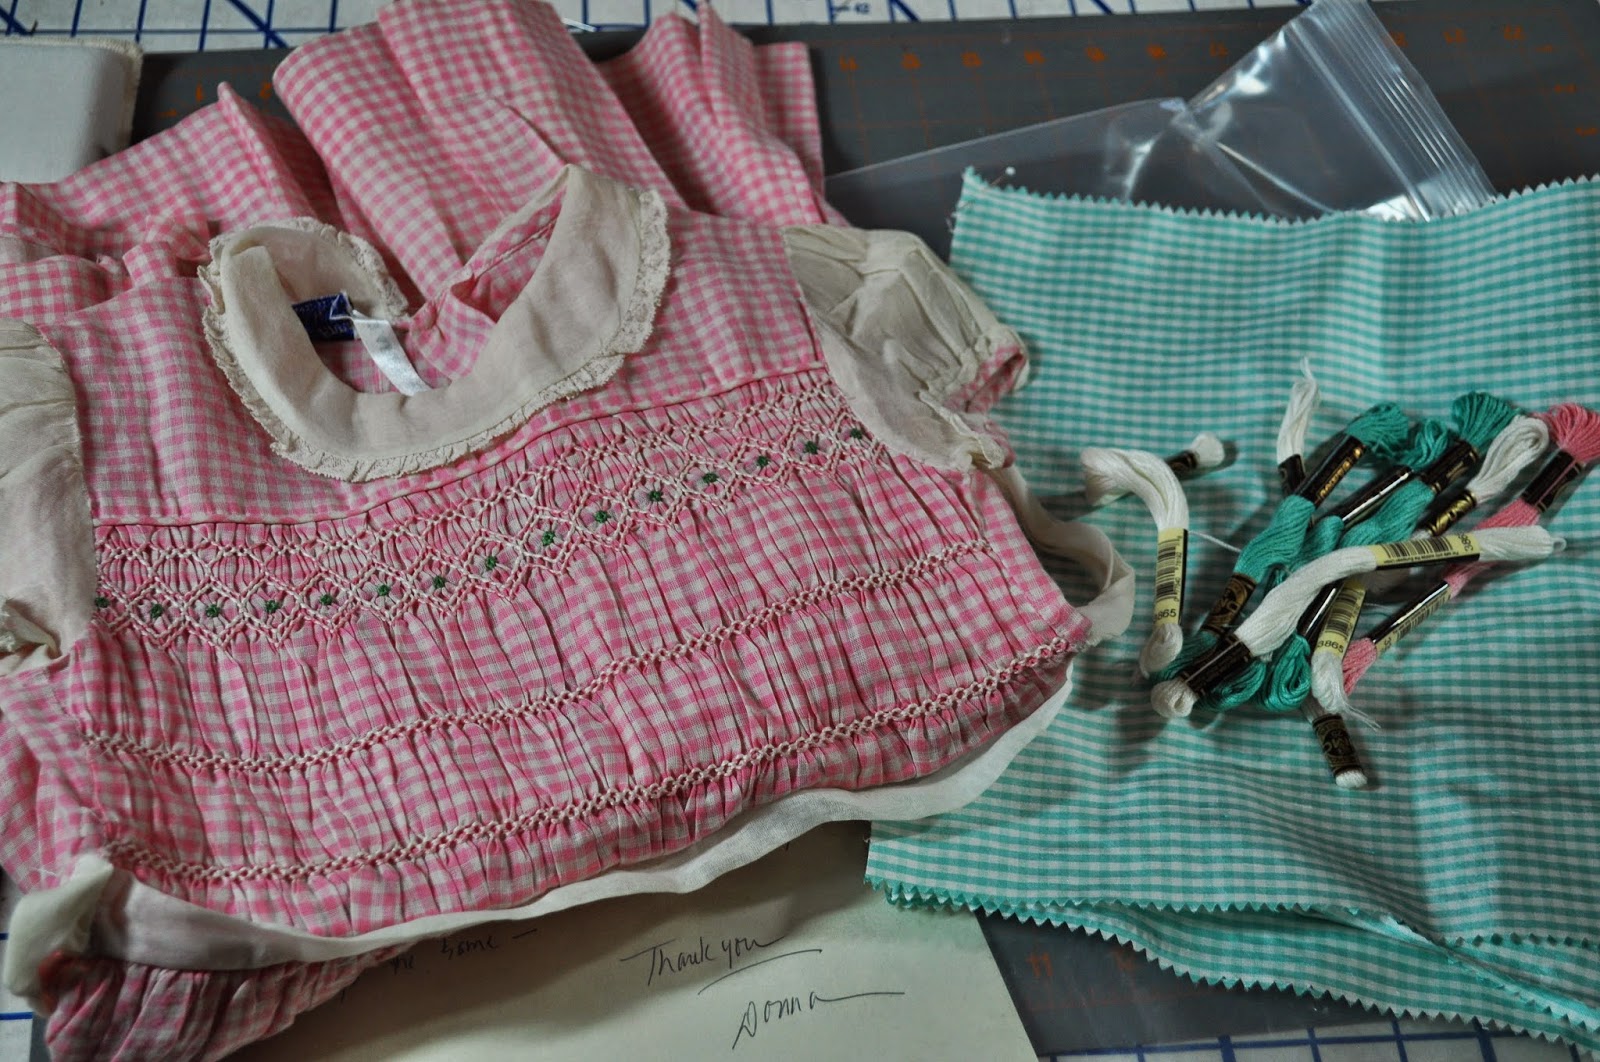

Due to Hurricane Sandy, the costumers were behind on their schedules for opening night so I agreed to complete it and return as quickly as possible.

I loved working with the silk taffeta and pleating it was a dream!


Next I blocked the piece to fit the yoke of the vintage dress I'd been given.  Since I was working with a gingham, it was easy to make sure everything stayed lined up by following the horizontal lines.  This is where things can look "wonky" if not pleated straight.  "Wonky" pleating will cause the  gingham lines to appear distorted (they even make my eyes hurt).


Now the fun part! SMOCKING!!!! I scanned the vintage dress so I'd have a makeshift "template" that I could write on and compare to my newly pleated and blocked piece.


The vintage pink gingham dress had been designed to have the pleats "puff" between rows which required less smocking time (but more cuddly time for the Maltese babies).


Finally, the finished insert, ready to be shipped back to NYC.


******edit 11/6/14
            I never found any pictures with the costume on a little actress :( but thought with holidays coming up it might inspire someone to use an older, vintage garment to create a special Christmas dress.  Don't be afraid of taffeta or silk dupioni!  I loved smocking on it and hope to recreate more garments in the future.


Sew Happy Stitches!

Renee

Tuesday, November 4, 2014

Baby Quilt Tutorial-Assemble the Top

Baby Quilt Tutorial-Assemble the Top is part 4 of the series on how to sew a unique but simple quilt suitable for beginners or more advanced seamstresses.


A baby quilt can be used for many purposes.  Obviously for babies-either to  cover them, lay them on the floor or wrap them up, but baby quilts are the perfect size for snuggling on the couch, laying across the lap of an elderly relative or friend or even taking to an outdoor sporting event!  With all the variety in fabric choices, the possibilities are endless!


Today's tutorial will consist of assembly of all the parts and pieces we've cut in previous tutorials. (see them HERE and HERE)


I used regular Coats and Clark cotton mercerized thread to piece my quilt top.  (Quilt terminology for "assembly of the top pieces" or "sewing it all together")  I used the same in my bobbin.

Start with the little pieces first.  In this case they are the chevron or the two 3" pieces I had you cut previously.  Pin one 3" piece with the right sides together against the middle fabric. (this puts the seam on the inside with the pretty fabric on the outside when complete) My middle fabric is the elephants or the 12.5 inch long piece on your quilt.  Repeat for the other 3" piece on the remaining middle section.

Right sides together and stitch!
Now you can use a 1/2 " seam and stitch on the outside edge to sew each piece to the middle block.

Repeat the process with the bottom block, in my case the plaid 24" and then again with the top block which is the remaining 6.5" block.

This finished piece is your quilt "top"!  

Be gathering your supplies for next week and we'll begin to quilt by machine.  You'll need batting in crib size or a remnant from a larger quilt.  Remember it will be bigger than our top to allow "grace".
We'll use Coats and Clark mercerized thread for the quilting on this project.  Always have extra machine needles handy--Schmetz 80/12  or 90/14 are good sizes for this project.  

Sew up a Storm!!
Renee


PS.All tutorials, information and images are the property of Renee Galloway at Ney Ney's Nest and are intended for personal use only.  Feel free to re-blog, pin, share with attribution to Ney Ney's Nest.  For all other purposes, please contact me at reneegalloway@me.com.  Thanks!

Tuesday, October 28, 2014

Baby Quilt Tutorial-Cutting It Up

Today's post is all about getting the fabric cut and ready to go!  I like to do all my cutting at one time, put the cut fabrics in their bag or tote (see Baby Quilt Tutorial-Organization) so I'm ready to sew when time allows.

My preferred method of cutting is with a rotary cutter, Omnigrid ruler and a self-healing mat.  Make sure your rotary cutter has a fresh blade so you can make precise, clean cuts.  I keep spares in my sewing cabinet (watch those coupons and save!)

I made my quilt 36x48.  It is sufficient to cover a crib (rarely ever done after baby gets here!) or to use as a floor mat or baby seat cover in cooler weather.  Both my children received quilts made by my aunt and we used them for all of the above and even as nap covers when they moved to their "big boy and big girl" beds!

I chose 3 fabrics for my quilt.  The plaid I chose to use as the "header" and "foot", the chevron as the back and decorative band, and the elephants as the feature fabric.
With the completed quilt, you see the crosswise grain goes left to right and length goes north to south.

Since fabric is 42-45" crosswise, I chose to make the crosswise grain my width. This also prevents any stretching or give in the pieces due to the weave of the fabric.  Initially I cut the whole length of the fabric and then cut to size later.  (this gives me lots of "grace" area for shifting layers later in the construction)

I then cut the length from the "length of yardage".  Since my quilt will be 48 " long, I need 1 3/8 yards.  (Again, I like "grace" so I usually get 2 yards.  Any scraps can be used later for appliqué or a scrap quilt)  Use your rotary cutter and omnigrid ruler to make a square cut by lining up the bottom of the ruler on the fold and cut at the 2 yard mark along the crosswise grain.


The next step is to cut the front pieces!   A note here in the event you chose a directional print like I did, you MUST pay attention to the print.  In my case, I made sure my cutting lines were along the design lines to prevent a "wonky" looking piece.
(Check out the above photo...look at the cutting line for my chevrons--the tip of each all the way across the width of the fabric, my plaid fabric is along the same "line" of plaid the whole length of fabric)

The "header" (plaid) = 6.5" x width of fabric (WOF)
       "footer"  (plaid)= 24"x WOF
        bands   (chevron)= 2 each of 3" x WOF
        main     (elephant)= 12.5 x WOF
        backing (mixture of plaid and chevron) 48 x WOF
         Since my quilt will be 48 " long, I need 1 3/8 yards.  (Again, I like "grace" so I usually get 2 yards)
         For this quilt, I wanted to add an extra strip of color, so I combined leftover fabric to make my 
         2 yards after sewing them together.
        4 yards of quilt binding to match ( you can make your own bias strips or purchase ready made)

 You will also need crib sized batting. There will be excess but that is the "grace" allowance I talked about earlier.  I prefer a scrimmed cotton batting.  Warm and Natural is my favorite brand, but others may be used.   It can be purchased online or at many sewing shops.

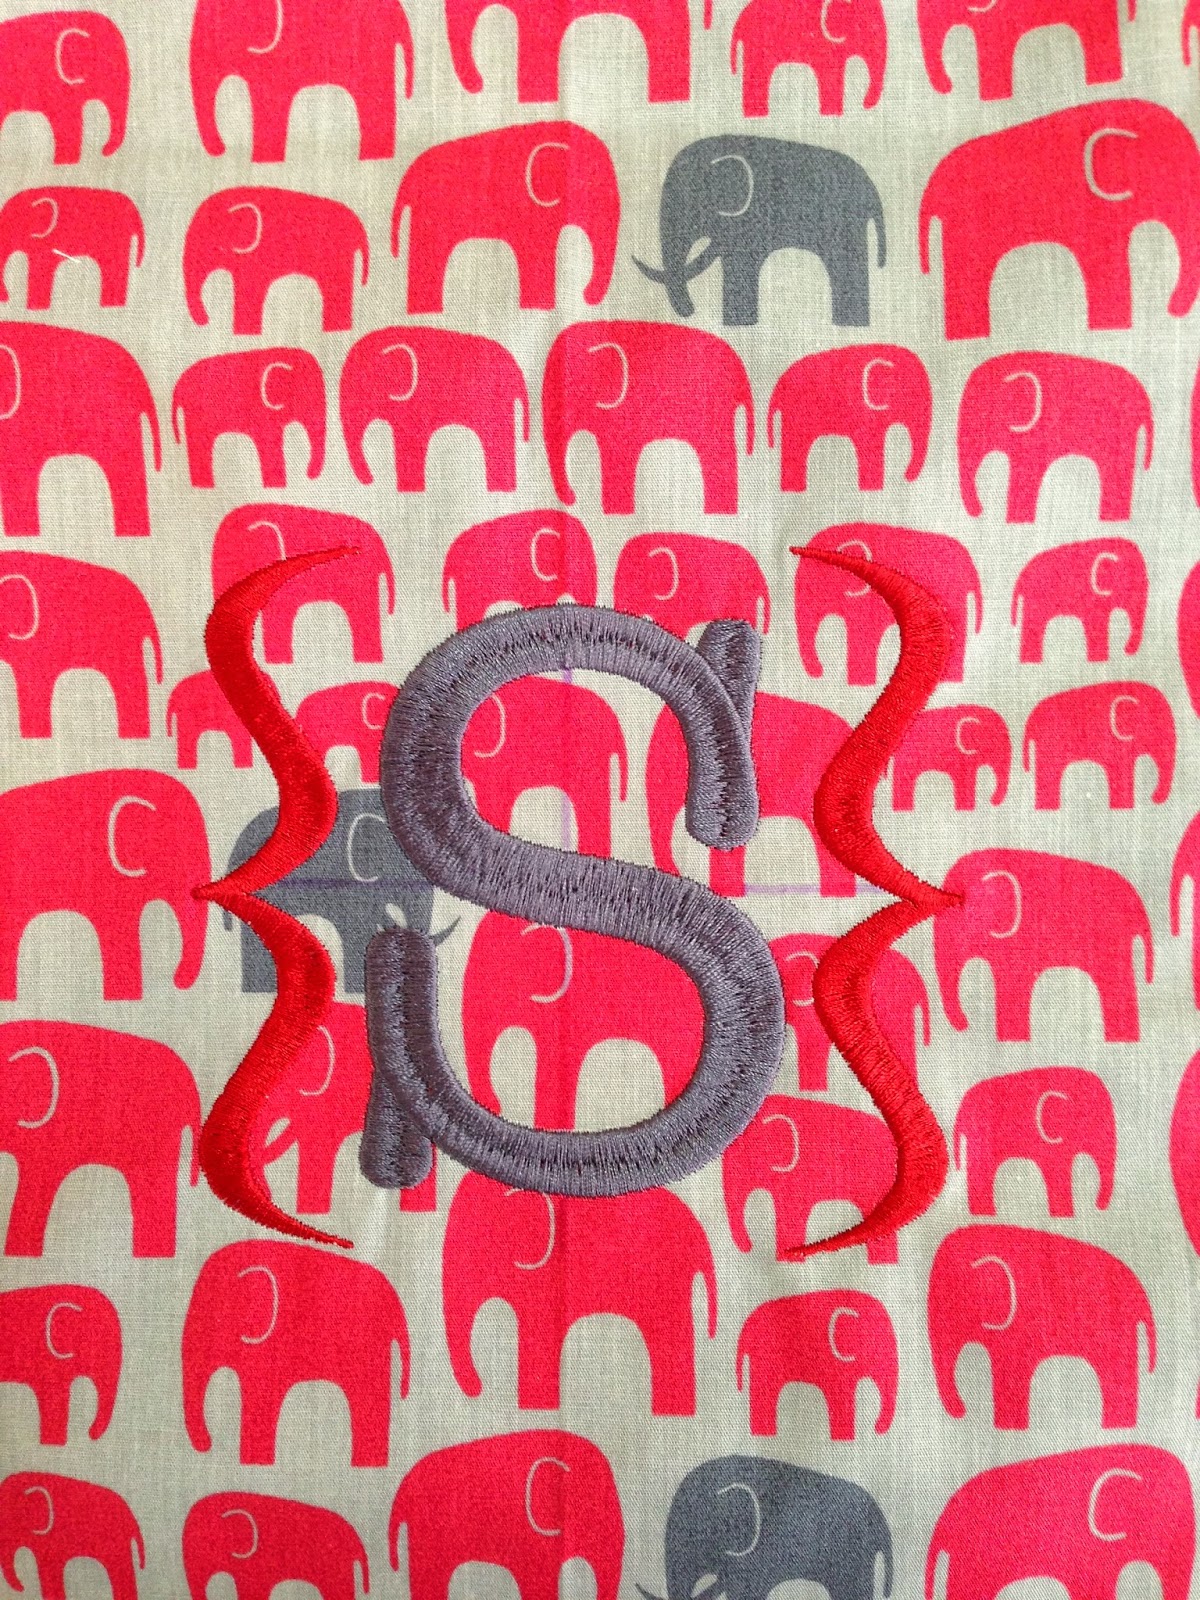
I chose to embroider an initial monogram onto my main fabric.  If you choose to embellish with any embroidery.  Do it now after centering it on your fabric pieces.

We'll sew in our next tutorial!

Cut carefully.....
Renee Galloway

PS.All tutorials, information and images are the property of Renee Galloway at Ney Ney's Nest and are intended for personal use only.  Feel free to re-blog, pin, share with attribution to Ney Ney's Nest.  For all other purposes, please contact me at reneegalloway@me.com.  Thanks!


Tuesday, October 14, 2014

Baby Quilt Tutorial-Getting Organized

Recently my daughter asked me to make a quilt for a friend expecting her 3rd baby.  After all, the 3rd baby deserves something new, right?  I was the oldest child and always got the "new" items, however, my sister ended up with the "hand-me-downs".  What about you? New or Hand me downs?

Since the recipient is a big "Roll Tide" fan,  cute elephant fabric was a key feature as well as team colors!  Check out my post using another team fabric for a cute pillowcase dress that is a quick afternoon project!

Completed quilt
First and most important is the fabric selection.  I enjoy this process...it is like shopping...so much to choose from!  Remember color and scale in this process.  You want a mixture of small, medium and large prints.  What about a solid?  Do the colors or "hues" match?  Are they complimentary? (maybe another blog post on color selection?  let me know!) What about thread?  Embellishments such as a monogram or trims like rick-rack, velvet trim, embroidery?

For this quilt, my daughter chose a small scaled plaid (of course in Alabama colors), a larger scaled gray/white chevron and the favored elephant print, which was a medium scale and the basis for all the coordinating prints.  We visited a local fabric shop, Thimbles, and acquired the plaid and elephant fabrics(Farmhouse Fabrics).  I had the chevron(RBD) in my stash.
Selected quilt fabrics (with monogram done)
Depending on the size of the project, I after I have selected my pattern, fabrics, thread and any other items I might need for the project, they all go into a rubbermaid tote or a large ziploc bag.  The zip locks come in 2 gallon or L, XXL and are very handy to keep all project contents together. Most Walmart or Target stores carry them.

 I also add all the pertinent information into my Quilting Notebook to keep all my doodles, drawings, fabric selections and measurements handy for later quilts and record keeping purposes.

Up next....cutting the fabric!

Happy Organizing!
Renee

PS.All tutorials, information and images are the property of Renee Galloway at Ney Ney's Nest and are intended for personal use only.  Feel free to re-blog, pin, share with attribution to Ney Ney's Nest.  For all other purposes, please contact me at reneegalloway@me.com.  Thanks!

Monday, September 8, 2014

Pillowcase Dresses and Football

Pillowcase dresses are all the rage for little girls, so creating them for football fans seemed natural.  

The appliqué and monogram  took longer than the whole dress construction process!  I It was done first on the block of fabric to be used as the largest portion of the dress.  While it was being monogrammed, I cut the two bottom bands to the same width of the main body and folded them in half and ironed them so I had a finished bottom edge on both.  Note that the first band (the paw prints) is smaller in width than the bottom band (polk a dot) so that it creates two layers of folded finished edges.  
After the applique was completed, I made a sandwich of the main fabric (chevron in this case) RS up, the paw print band next with raw edges together on bottom of chevron, then last I put the polk a dot band on top with raw edges together.  Then I serged all three together at the same time! I did this for the front and back pieces.

Then fold the seam toward the top and press.  (The bands should line up, from this angle it looks like they are not, but they are!) The side seams are sewn on the machine AFTER serging the sides and top of the front and back pieces as a FINISHING seam. DO NOT SERGE THE SIDE SEAMS or there will be no place for little arms!!!!
Measure down from the top (in my case for a 12 mo size it was 7inches) .  Machine stitch the sides from your mark down to the hem.  
Iron the remaining(armhole) seam the same width as the side seam and topstitch. Serge across the top (neckline) to finish the raw edge. Then iron the top neckline down 1.5 inches for the casing.  Add a cute ribbon and viola!  A cute pillowcase dress!!

War Eagle and Happy Stitching!
Renee

PS…All tutorials, information and images are the property of Renee Galloway at Ney Ney's Nest and are intended for personal use only.  Feel free to re-blog, pin, share with attribution to Ney Ney's Nest.  For all other purposes, please contact me at reneegalloway@me.com.  Thanks!


Thursday, August 28, 2014

Wreath for the Duck Hunter


Since my MOG duties included the rehearsal dinner, I wanted to incorporate my son's love (and yes, obsession) with duck hunting.  Yes, he gets his obsessive qualities from his mother's gene pool honestly.  His is hunting and mine is all things sewing....why not combine the two???

He sent me a picture of two "love" ducks so I added a little to the newly digitized design to include the date and their names.  I purchased the 12" wide burlap ribbon that is so readily available at Hobby Lobby ( use the coupon and you'll save bundles!).  This was to be the nucleus of my duck wreath theme.  I used my 6 needle Brother 600II to embroider the duck design on this burlap using heavy weight stabilizer that I cut away from the back side and Press and Seal (yes from the kitchen) on top to keep any needles from getting caught on the wide weave. (sorry I didn't take pics of the process, check out the blog post Machine Embroidered Dog Collar).  The rest is history!  A few cat tails, a resin duck and some greenery!  Oh, and let's not forget the big "G" I got off the clearance aisle at Hobby Lobby a couple of months back!

I threw together another arrangement for the head table while I was decorating the tables....

Susan Spann did our cake.  Check out her FB page  Susan's Sweets.  
Could you tell we used the "duck hunting" theme???

All in a day's work!
So happy when I'm stitching,
Renee
PS.  Please be mindful of the use of any content.  It is the property of Renee Galloway.  Feel free to share but give credit where it is due.  Thanks!


Tuesday, August 5, 2014

Machine Embroidered Dog Collar


This post is all about Nelli and her participation in my son's wedding as ringbearer!
Since she is his baby, he and the bride wanted her to be in the wedding.  Naturally grandmom (or Ney-Ney) needed to make wedding attire!

I started with scrap white broadcloth that I had cut off the flower girl dress prior to hemming and used the same mini blue rick rack I had put on the flower girl's angel wings. (see previous post Wedding Sewing)  It was easy to make a casing and straight stitch the rick rack on each edge, but how did I want to embellish a dog collar to make her look like a girl but not make the son say "no way Mom!" ?

Why not use the same machine embroidery design I used on a burlap ribbon for other wedding decor?
Egad! I love working under pressure (yes, it was the night before we were supposed to head to the out of town wedding and the day after I had spent the whole day in bed with strep throat)!!!

I pulled a piece of burlap out of the trash can and readied it for embroidery by using spray adhesive onto Wet and Gone stabilizer.  After hooping and pulling up my saved design, I threaded the proper thread and began my "in the hoop" dog tag.

A satin bow the same color as the flower girl's and blue satin ribbon with love knots to hold the bow together were added to make the perfect wedding collar for our Nelli!


In Stitches,
Renee
PS.  All content is the property of Renee Galloway.  Please feel free to pin on Pinterest or share but remember to give credit where credit is due!  Thanks!