So, you've blocked your piece and are ready to begin smocking! Go to my Picture Smocking Unraveled-Part 1 to block your piece. There is still a little "prep" work to be done to ensure "picture perfect" picture smocking. (hehe love the pun?)
Next you need to secure the holding row on the top. If you're doing an insert you can either remove from the board and smock the holding row or leave it on to make sure you don't pull the stitches too tight and draw up the pleats. I recommend leaving the piece on the board with pins if you are a beginner or smock tightly. If you are doing a bishop, LEAVE IT ON THE BOARD!! You don't want to draw up the pleats with your stitches and make the insert or bishop neck too small.

First, cut a piece of floss about 18 inches long. I use tip of my middle finger to my elbow as a guide. Then close your eyes and run your thumb and middle finger down the floss. Does is glide smoothly or feel like it has little burrs? Start at the opposite end and repeat. The direction that the floss was in that felt smooth is the way you want it to go through the eye of your needle so it will glide through the fabric and not catch. It also makes prettier stitches.

Next, we will strip the floss. Roll the thread between your fingers so that they separate a little and pull one strand out at a time. It is easier to do this from the smooth side I mentioned before to keep it from ending up in a "bird's nest" like my picture.

I usually use a thread color to match the fabric I'm working on. In this case, it is white. For the holding rows and backsmocking I use 2 strands of floss. Once you separate each strand, put them back together.

Notice that I rolled the 2 strand together by wrapping them around 2 fingers (above) and then I use my handy dandy altoid tin case to store these threads in as well as my needles (stuck in felt-color coded to discern types of needles) and my little embroidery scissors. (below pic)

Your next step is to smock the holding row by doing the cable stitch all the way across on the right side of your insert/bishop neckline. Remember the saying "cable up-tail down and cable down-tail up" just like a cat going up the stairs, his tail is down and a cat going down the stairs, his tail will be up.

then begin your cable stitches. CABLE DOWN- tail is up and first stitch crosses 2 pleats.

Next CABLE UP (tail is down) and only cross one pleat from now on!

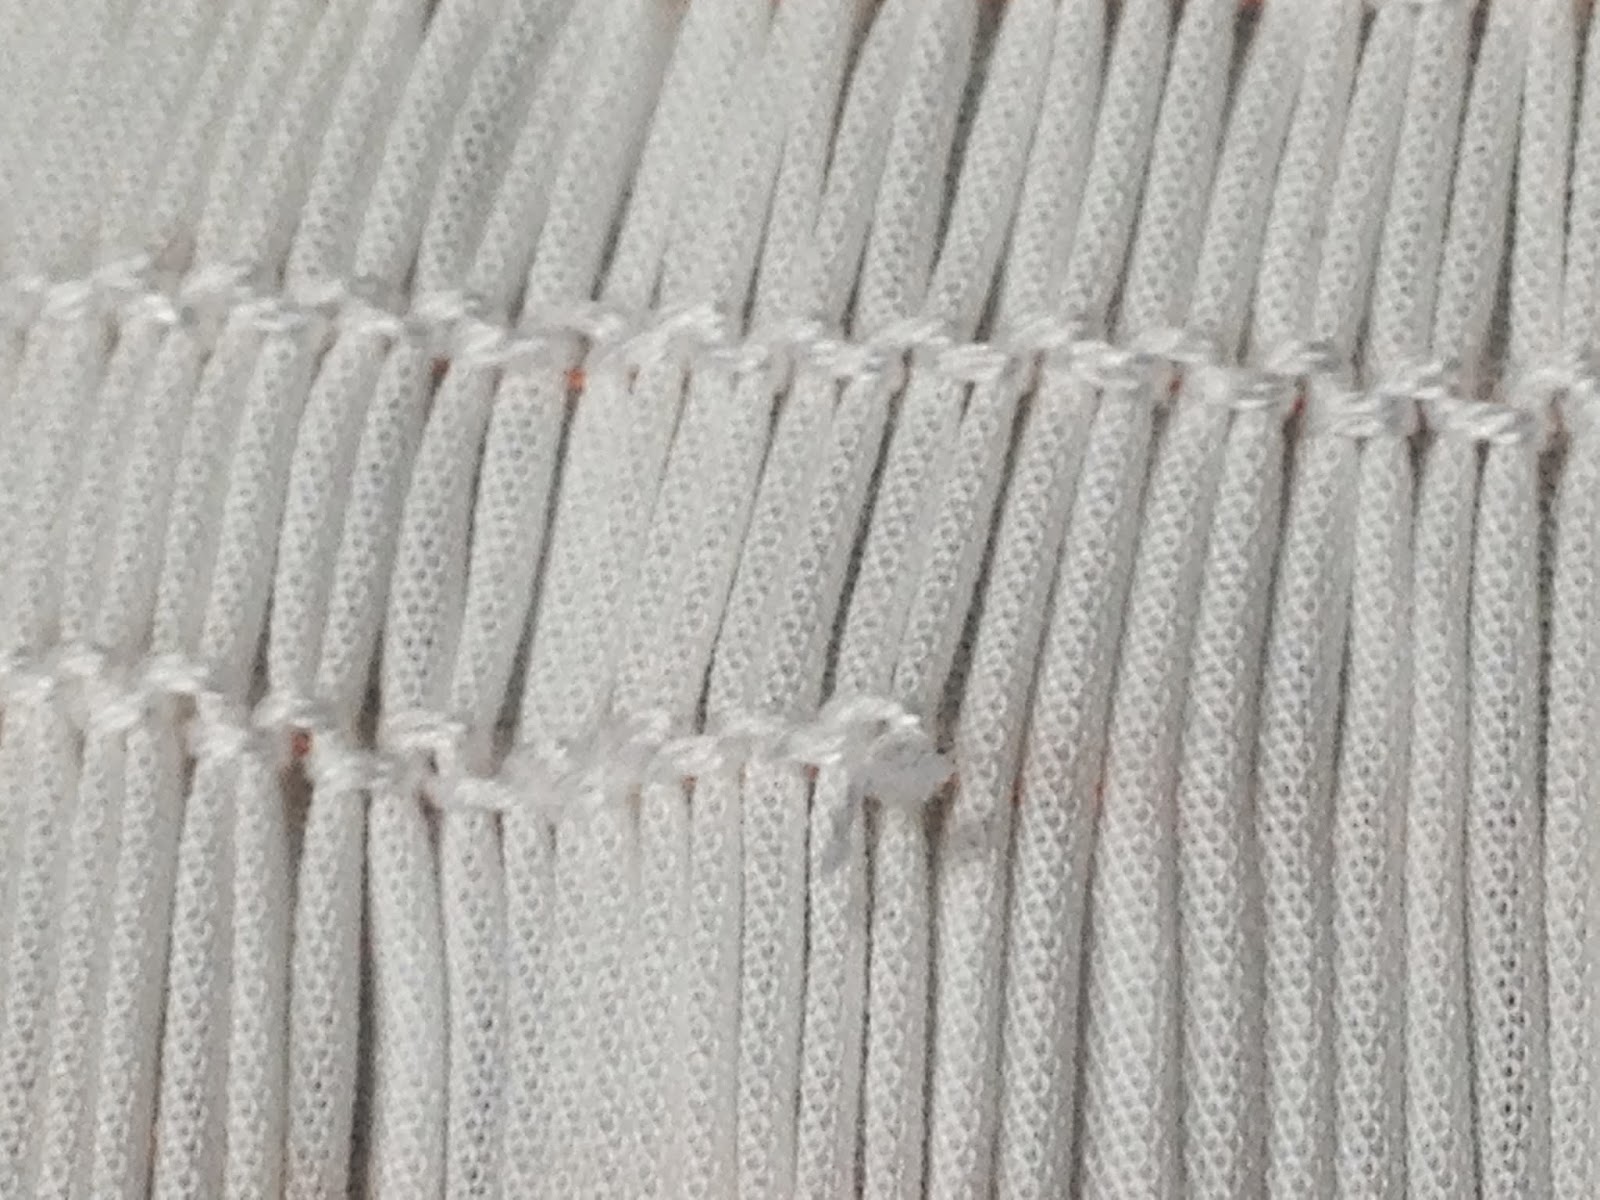
Completed holding rows!
To BACK SMOCK you will turn to the wrong side of your insert (Only do this on an insert, not a bishop- a bishop is designed to spread across the shoulders and neck) and cable on each row.
You will probably run out of thread before crossing the entire piece. When you need to rethread your needle, just loop through the pleat you just completed and insert the needle through the loop. Take the needle back through the pleat with just a little "bite" in the fabric and cut the tail off. When you begin again, pretend you didn't just tie off and put your needle back into the same pleat and continue.

Continue back smocking until all gathering rows have been smocked. Some prefer to back smock after picture smocking. I've tried it both ways and prefer the stability that back smocking first provides.
Any questions, please ask! Comments welcome!
Happy Stitching,
Renee
Next you need to secure the holding row on the top. If you're doing an insert you can either remove from the board and smock the holding row or leave it on to make sure you don't pull the stitches too tight and draw up the pleats. I recommend leaving the piece on the board with pins if you are a beginner or smock tightly. If you are doing a bishop, LEAVE IT ON THE BOARD!! You don't want to draw up the pleats with your stitches and make the insert or bishop neck too small.
First, cut a piece of floss about 18 inches long. I use tip of my middle finger to my elbow as a guide. Then close your eyes and run your thumb and middle finger down the floss. Does is glide smoothly or feel like it has little burrs? Start at the opposite end and repeat. The direction that the floss was in that felt smooth is the way you want it to go through the eye of your needle so it will glide through the fabric and not catch. It also makes prettier stitches.
Next, we will strip the floss. Roll the thread between your fingers so that they separate a little and pull one strand out at a time. It is easier to do this from the smooth side I mentioned before to keep it from ending up in a "bird's nest" like my picture.
I usually use a thread color to match the fabric I'm working on. In this case, it is white. For the holding rows and backsmocking I use 2 strands of floss. Once you separate each strand, put them back together.
Notice that I rolled the 2 strand together by wrapping them around 2 fingers (above) and then I use my handy dandy altoid tin case to store these threads in as well as my needles (stuck in felt-color coded to discern types of needles) and my little embroidery scissors. (below pic)
Your next step is to smock the holding row by doing the cable stitch all the way across on the right side of your insert/bishop neckline. Remember the saying "cable up-tail down and cable down-tail up" just like a cat going up the stairs, his tail is down and a cat going down the stairs, his tail will be up.
then begin your cable stitches. CABLE DOWN- tail is up and first stitch crosses 2 pleats.
Next CABLE UP (tail is down) and only cross one pleat from now on!
Completed holding rows!
To BACK SMOCK you will turn to the wrong side of your insert (Only do this on an insert, not a bishop- a bishop is designed to spread across the shoulders and neck) and cable on each row.
You will probably run out of thread before crossing the entire piece. When you need to rethread your needle, just loop through the pleat you just completed and insert the needle through the loop. Take the needle back through the pleat with just a little "bite" in the fabric and cut the tail off. When you begin again, pretend you didn't just tie off and put your needle back into the same pleat and continue.
Continue back smocking until all gathering rows have been smocked. Some prefer to back smock after picture smocking. I've tried it both ways and prefer the stability that back smocking first provides.
Any questions, please ask! Comments welcome!
Happy Stitching,
Renee