Showing posts with label Quilting. Show all posts

Thursday, July 19, 2018

Where Is It????

Where is it???  I mean, when I get ready to start a project, I want to know where the pattern is, get all my supplies together and in a project box.  That way I don't spend valuable time "hunting down" a quilt pattern.  Or, what about "I need a baby quilt by next weekend..." prompts a huge game of hide and seek so I can pick out the perfect project.

I decided to try logging my magazines into a Numbers program (MAC users-PC users it is Excel) so I could decipher my various quilting magazines and the projects therein.  About a year in to this endeveour, I find the typed columns a bit of a puzzle.  I needed a way to categorize, have a picture of the project for easy reference as well as tags to search and pull for me.  A way to search quickly, then pull the magazines or books would be a novel way for this OCD to retrieve information from all the invested money for "resources" (ie.patterns,magazines and books that come regularly to my house).


 It would have been handy in my last project (which I need to do a post on) in using rulers correctly--or better yet, why I needed a specific ruler for a specific purpose.

Going to the "trusty" internet, I located an app/program that will record, categorize and tag books, music, videos, etc.  Why not my favorite quilting periodicals?  With a little adjusting, I was able to enter my own cataloging system.  Now, perhaps, I can locate projects that fit the requirements I'm looking for, pull my magazines, (which are also organized by this OCD into binders for easy retrieval) and sip my coffee while perusing the project that will "fit the bill" and make me happy.  And, by the way, it is free for 5,000 entries. Did I mention it is available as an app for your IOS devices and it syncs all information!!!

This month's McCall's Quilting Sept./Oct issue is my trial for using libib.  It is pronounced "luh-bib".
I set up an account and have the option to publish it for anyone to use or keep it private.  What are your thoughts?  Should I publish? Would you utilize something like this to help with your project planning?  Check it out at neyneystitches.libib.com!

Happy Searching and Stitching!
Renee (Ney-Ney)


Thursday, March 15, 2018

Quilting is my passion!

Quilting is a facet of sewing that has become my passion.  I do all areas of sewing....home dec, garments, children's heirloom, smocking, and have dabbled in quilting as a way to share a homemade gift.  The quilting bug has bitten hard and is my "passion".  I still love handwork but guess what??? It is English Paper Piecing!!  (a little obsessed here as well).


Over the past 2 years, I have transformed my sewing space ( or "happy place" as I call it) into a quilt haven.  Learning how to create a quilt from beginning to end has become my "media" of choice.  T-shirt quilts for children precipitated the quilting bug's bite while I received chemo treatment for breast cancer.  It gave me something to do with my hands as well as a memorable gift for the upcoming Christmas season made from their high school shirts that had been sitting in a rubbermaid tote for a couple of years.  I used the "tie" method of to hold together the quilt sandwich.

Then came 2 memory quilts for a young woman and her mother-in-law.  I watched her grow up so creating something special for her since she  had lost her young husband in a tragic accident was important to me.   These were actually 2 quilts in one--becoming 4 tops made into 2 quilts.  One side was t-shirts, the other was button downs that were cut into the bow-tie block per her request.

Since making those 4 tops and my own son and daughter-in-law's wedding quilt, I decided I was tired of pushing the quilt around on a domestic machine.  Research on what long-arm would suit me best began.  It helped that we had moved into a home with a "bonus" room over the garage that was quickly claimed as my new sewing space!

What led to your quilting journey?
Do you sew other things?

Always in stitches!
Renee (Ney-Ney)

Friday, March 25, 2016

Quilting stencils with my Scan and Cut

So, I'm branching out and going to attempt "designs" in my next quilting project rather than "stitching in the ditch". I'm using a domestic machine so let's hope I don't pull what little hair I have out in the creative process!

I have recently taken my Scan and Cut out of the box in the closet ( where it has been for nearly a year) and decided to learn to use it in my quilting.  In my quick attempt to get my stencil done prior to leaving town and carrying all my supplies with me, I didn't take pictures of the process itself, but if there is interest, perhaps a tutorial later?

I found poster board sized plastic sheets at my local Hobby Lobby while getting regular poster board and wondered if I could cut my own stencils.....by George I did!


A few words of advice:
  1. Use a sharpie to make your lines thick enough for the scanner to read.
  2.  Make large dashed lines to keep the design in one piece.
  3. A little trimming may be necessary.
  4.  Registration marks will need to be added.

I was able to mark my quilt, starting from the corners and working my way in to adapt the "meeting in the middle" design to fit my size borders.


Hopefully when I return home, I'll be able to begin quilting!
What methods do you use to transfer quilting designs?
Do you have any favorite quilting stencils?
Where do you get them?

Trying to stitch on the road,
Renee


Friday, March 18, 2016

The Splendid Sampler-Block #4-Happy, Happy

Happy! Happy! Isn't that a popular phrase due to the "duck hunters" on TV? Or perhaps the song "Happy" by Pharrell Williams which just happens to be my ringtone?

Jen Kingwell of Kingwell Designs created this block featuring her love for appliqué.
I just used my machine blanket stitch for my vase and stitched the flowers in a rather scrappy way.  May re-do this block later and attempt hand appliqué since I have two of her books and handwork appeals to me but I was on a roll with the machine and didn't quit.

Even though my block doesn't quite please me, I'm happy with it.  It's all about attitude.  Happiness is a state of mind!  
Happy stitching,
Renee

Thursday, March 17, 2016

The Splendid Sampler-Block #3-Lots of Love

Life is SPLENDID!  This block reminded me of all the love shown to me from family and friends these past 5 years...I've learned a lot about nurturing, sharing, caring and giving your time to help someone else in need.

The third block in the Splendid Sampler was created by Melissa Corry of Happy Quilting.


I'll have to say, I was surprised at how difficult this block really was.  Ripping, starting over, having warped fabric from ripping and sewing again, then finally cutting new fabrics for 3 more little heart blocks.  I was pleasantly surprised with the directional fabrics and how well they matched at the seams.  Wonkiness overcome!!!

With my SPLENDID  life comparison, it reminds me of how much I have learned about loving others.  Sometimes love is awkward and frustrating, but turns out so beautiful!  I no longer feel awkward visiting someone in the hospital, saying hello to a stranger with a deftly tied scarf and no eyebrows and the time taken from my day to make the visit or cook a meal is so rewarding!

Splendid and sewing!
Renee

Wednesday, March 16, 2016

The Splendid Sampler-"Wings"-Block #2

I'm working on the Splendid Sampler as much as life allows...that is the SPLENDID thing about quilting...it is always right where I left it when I return.

This block came all the way from Australia from Jane Davidson, the other co-creater of The Splendid Sampler, along with Pat Sloan.

My block taught me perseverance....also something needed in life.  I see the little pieces and how they need to line up "just so" in order to create the "wings" for the butterflies.  Did you know that the metamorphosis timeframe is 10-15 days for most butterflies?  I didn't feel quite so bad about how long it took me to get this block to my liking.  Sometimes things don't go exactly as planned, but that's life....A SPLENDID life!

Always in stitches,
Renee


Tuesday, March 15, 2016

The Splendid Sampler

Life isn't always splendid, just like a quilt...some of the blocks are easy to do, a few require rethinking and restitching, and then there are those that need to be left alone and revisited with a fresh perspective.

This sampler reminds me of my life the past few years.  A sampling of different experiences, trials and successes.  New acquaintances, renewed friendships, change and acceptance, learning new things or reinventing more familiar, or just enjoying the colors life brings.

The Splendid Sampler is a quilt along brainchild of Pat Sloan and Jane Davidson.  It is " a year long 100 block ‘Epic Adventure’ of quilt making".  Just like life...an "epic adventure"!  Every Sunday and Thursday morning, PDF downloads of blocks created by 83 different designers are released.
CLICK HERE for the link to The Splendid Sampler web page.

I'm behind on my blocks, but that is ok.  Life happens and as long as I get to sew a little each day I'm just "SPLENDID"!

                                 "Hearts Aflutter" is the first block of the quilt designed by Pat Sloan.

I am using fat quarters and scraps left over from "Modern Love" by Moda.  Originally the fabrics were selected for use in a 50th Anniversary Quilt for my mother and father-in-law.
This block features appliqué (I chose to do mine on the machine with a blanket stitch) and piecing with diagonals.  A great way to get started!!

In my "Happy Place",
Renee


Monday, January 19, 2015

Stitch in the Ditch

The only time it is a good thing to be in a DITCH is when you "stitch in the ditch".  This is a quilting method used to secure a backing fabric to the quilt layers or sandwich without doing anything fancy.  I have used monofilament thread in the top with 60 weight thread in the bobbin to match my quilt back. Using clear thread helps hide the stitch in the ditch and holds the quilt together to allow prettier quilting designs to be showcased.  It's helpful to use a walking foot but not necessary.


For example, I was working on several quilt as you go (QAYG) blocks and used this process to finish up my quilt.  When you QAYG, you actually build the layers one block at a time completely and quilt each one individually, THEN sew them together and add the backing, securing it with the stitch in the ditch method.  
Here are my "rows"with each block numbered with painter's tape.


Since I use my machine embroidery designs to quilt blocks, this method is good for me to be able to put the individual blocks into the embroidery hoop rather than the whole quilt!
This photo is of the "Wedding Wishes" quilt block.


Basically a stitch in the ditch is actually what it sounds like....stitching in the ditch of your seam.
Notes for "stitching in the ditch":
  ~seams need to be pressed open
  ~secures back to front with monofilament thread
  ~allows for quilting one block at a time
  ~helps with handling large quilts on a regular sewing machine

Stay out the the road ditches (especially this time of year) but let your stitches always be in the ditches!

Renee

  P.S.All tutorials, information and images are the property of Renee Galloway at Ney Ney's Nest and are intended for personal use only.  Feel free to re-blog, pin, share with attribution to Ney Ney's Nest.  For all other purposes, please contact me at reneegalloway@me.com.  Thanks!

Sunday, December 7, 2014

Wedding Wishes Quilt

Have you ever wondered how long it would take to complete a king sized quilt on a regular sewing machine?  My husband jokingly would ask every week ,"just another week and you'll be through?".  I was determined to make an heirloom wedding quilt for my son and daughter-in-law as a wedding gift.  I didn't expect they would receive it 3 months after the wedding!
Newlyweds with their "Wedding Wishes"Quilt

I honestly have to say I didn't start it until one month prior to the wedding.  I spent hours planning, making practice blocks and hating what it looked like.  Scouring the internet for what was left of Joel Dewberry's Deer Valley in the Terra Cotta Palette took some time as well.  ( In addition to us moving from one state to another and being cook at Bible Camp)

It all started with the Antler Damask pattern I saw, pinned on Pinterest and sent to the future DIL since it fit both their personalities.  I didn't realize at the time it had been discontinued AND very popular!  The only fabric I found had already been made into a purse, but I bought it to recycle into a pillow.

First up in decision making was what quilt pattern?  I had SO many I liked!! What would suit their personalities?  Was is masculine enough for my "man-child"?  Would my new DIL like it? Was it modern enough for twenty somethings but yet still traditional? (or what they call "vintage")

  As I tried several blocks with varying fabric choices in the line I didn't "feel it".  So I did what all artists do...stepped away from it until I could feel invested in the design.  I ran across a "string" quilt pattern by Moda one morning while cruising through pinterest.  I printed the directions and modified the size and wrote all the adjustments in my trusty quilting journal while hurrying to the machine to do a couple of test blocks.  Viola!!! This was it!!! Modern enough fabrics, masculine enough and traditional looking.

Choices had to be made and the "Quilt As You Go" method was a no-brainer for a king sized quilt that was going to be done on a domestic, regular old sewing machine! I kept two machines humming while I stitched the "strings" and then embroidered my quilting pattern on another.

The couple only received a ROW of the quilt at a shower in July prior to the August wedding!

I was able to steadily work (this is when the hubby would walk by my sewing room and tease me about how LONG it was taking to do this quilt) and finally completed the top!

Maggie approved the top (after this photo more blocks were added with 81 total!)

My daughter-in-law and daughter helped consult with me on how to do the "drop" off the mattress.  We decided to use the leftover jellyroll strips to make this drop around 3 sides of the quilt.  It would be more of a comforter and no fold down.  Shams would be made to match (still working on those!)
The HARDEST part was to quilt using a stitch in the ditch after securing my backing using lots of curved basting pins!  Since it was VERY heavy, I could only work in little spurts before my arms and fingers were worn out from the weight of such a LARGE quilt.

I made a bias binding in a fabric I hadn't used in the quilt but was part of the collection. 

The best part of all was giving them the quilt.....

and seeing it on their bed!


Now to tackle some other quilts!!!!

Happy Quilting!
Renee

P.S.All tutorials, information and images are the property of Renee Galloway at Ney Ney's Nest and are intended for personal use only.  Feel free to re-blog, pin, share with attribution to Ney Ney's Nest.  For all other purposes, please contact me at reneegalloway@me.com.  Thanks!


Tuesday, November 18, 2014

Baby Quilt Tutorial-Quilt Sandwich

Making a quilt sandwich is similar to building a sandwich in the kitchen.  A top and bottom additional layers in between held together with condiments.  In our case, the "condiments" will be adhesive spray and/or safety pins.

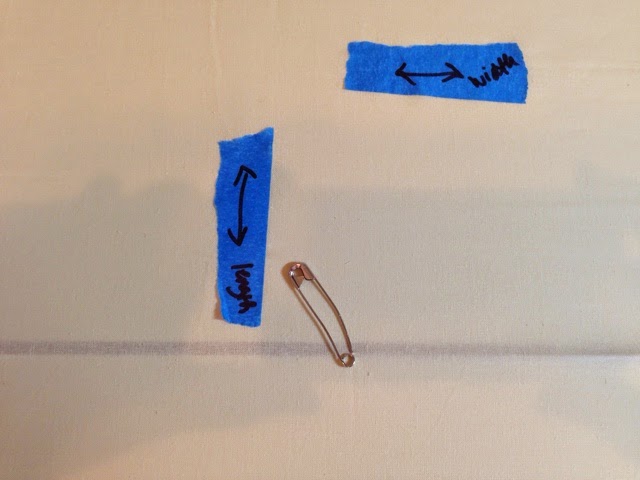
Clean off a cutting table or floor so you can spread the quilt out right side down.  This step is like laying your bottom piece of bread down to get ready to build your sandwich.  I like to fold my backing in half lengthwise and then crosswise to make a point and find the center.  Mark through one layer of fabric with a safety pin.  I also like to use painter's tape with arrows drawn on it to show my length and width.  (This is handy when layering a large quilt such as a king in my sample but not as pertinent with a baby size)

Then spread your backing out RIGHT SIDE DOWN and if on a table, secure with binder clips (find them at your local office supply store) or if on the floor (ouch my knees and back) secure with painter's tape around the edges.

Repeat the folding process with the batting and quilt top to find the center.  Our batting is the next layer in our QUILT SANDWICH!  I like to use adhesive spray to keep my layers nice and smooth.  Typically I use what I can get at my local craft store using my iphone coupons!   Match up your batting center with your backing center, making sure your width and length are both going the same directions! Remove the pin and tape from the backing layer and spray with a little adhesive spray and begin smoothing from the center to the edges.  Take the binder clips off and reattach them including the batting or tape the batting layer to the floor.


Repeat this process with the quilt top (the final top piece to our QUILT SANDWICH-again, I didn't have pictures of the baby quilt in this process, so this is a different quilt!)  Remember to spray lightly with the adhesive spray, smooth to edges beginning at center and then re-clip or tape.
Now the FUN part....safety pins
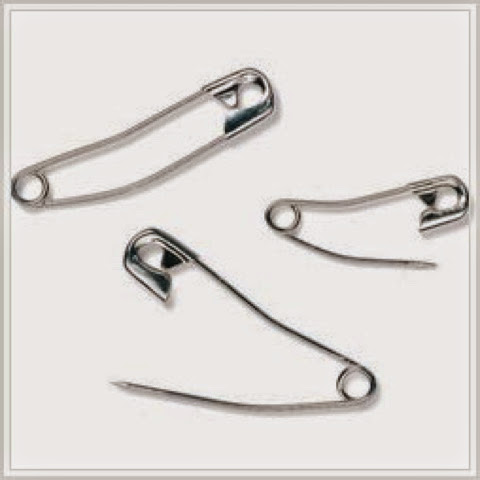
I like to use curved basting pins and willingly pay the extra for them.  They save the fingernails and fingers when trying to close them with the quilt sandwich layers firmly secured to either the floor or table.  

They come in a variety of sizes and can be purchased at most craft/fabric stores and online.  There is even a handy tool to save the fingers if you so desire!
This part of the process is time consuming but most necessary to have smooth quilt layers.  Beginning in the center of the quilt, pin safety pins through all the layers, smoothing and pinning your way to the edge. Pin every 4-6 " until the entire quilt sandwich is full of pins, securing the layers together (much like your toothpick with the colored cellophane in your deli sandwich).  

When you are completely finished pinning, you may remove the binder clips or tape and you are ready to quilt the layers together.  (*another note on my picture---I had pre-quilted my blocks, thus the stitching--yours will be plain)

Be careful pinning!  Watch those fingers!
My favorite sandwich is a BLT and a quilt sandwich....what about you?

Pin away!
Renee


P.S.All tutorials, information and images are the property of Renee Galloway at Ney Ney's Nest and are intended for personal use only.  Feel free to re-blog, pin, share with attribution to Ney Ney's Nest.  For all other purposes, please contact me at reneegalloway@me.com.  Thanks!


Monday, November 17, 2014

Baby Quilt Tutorial-Quilt By Machine

In this tutorial, we will machine quilt our "sandwiched" quilt that we assembled in the prior blog on how to assemble a quilt sandwich. 

  This technique works best with a walking foot.  This particular presser foot helps feed the layers over the dog feet (the zig-zag like treads under the presser foot).  It can only go forward and backward and is typically only used for directional lines and stitching in the ditch.  (perhaps another tutorial?)

Another technique to quilt on the machine is free motion quilting.  This technique uses a darning or open toed presser foot. The dog feet are dropped out of the way and the quilt sandwich is moved with your hands to create intricate and creative designs!  I'm just beginning to try this technique.  

Lastly is a technique using the normal foot and machine stitches programmed into your machine.  Stippling, zig-zag, curves, shells, etc are all designs that can be used as is or modified to create quilting lines to hold your sandwiched layers together.  This photo is demonstrating an "S" stitch that I elongated to quilt the plaid sections of the baby quilt.  The painter's tape (I use a LOT of painter's tape in my studio!!!) is a method to keep me lined up properly without having to mark the quilt and wash the marks out.  Just stitch a line, measure and quilt, move it and start again!

It is best to start quilting from the center of the quilt and move outward in quadrants.  The purpose behind this rule of thumb is to smooth the layers from the middle to the outside edges.  Creeping can occur (and is normal) of the layers as the presser foot feeds them through the machine.  That is why I included the "grace" (see other Baby quilt tutorials) on all the edges.

I also like to vary my patterns.  On the elephant print I did a straight stitch set on the diagonal.  The plaid got a wavy stitch and the chevron I followed the zig-zag of the fabric.  
 
This is the backing I used-plaid is on the reverse.  Note that the waves aren't perfect!

Remember to have a new needle 90/14or 80/12, a full bobbin ( I hate to run out in the middle of a sewing sequence) and good thread.  (Perhaps another post?)


Happy stitching!
Renee


P.S.All tutorials, information and images are the property of Renee Galloway at Ney Ney's Nest and are intended for personal use only.  Feel free to re-blog, pin, share with attribution to Ney Ney's Nest.  For all other purposes, please contact me at reneegalloway@me.com.  Thanks!


Tuesday, November 4, 2014

Baby Quilt Tutorial-Assemble the Top

Baby Quilt Tutorial-Assemble the Top is part 4 of the series on how to sew a unique but simple quilt suitable for beginners or more advanced seamstresses.


A baby quilt can be used for many purposes.  Obviously for babies-either to  cover them, lay them on the floor or wrap them up, but baby quilts are the perfect size for snuggling on the couch, laying across the lap of an elderly relative or friend or even taking to an outdoor sporting event!  With all the variety in fabric choices, the possibilities are endless!


Today's tutorial will consist of assembly of all the parts and pieces we've cut in previous tutorials. (see them HERE and HERE)


I used regular Coats and Clark cotton mercerized thread to piece my quilt top.  (Quilt terminology for "assembly of the top pieces" or "sewing it all together")  I used the same in my bobbin.

Start with the little pieces first.  In this case they are the chevron or the two 3" pieces I had you cut previously.  Pin one 3" piece with the right sides together against the middle fabric. (this puts the seam on the inside with the pretty fabric on the outside when complete) My middle fabric is the elephants or the 12.5 inch long piece on your quilt.  Repeat for the other 3" piece on the remaining middle section.

Right sides together and stitch!
Now you can use a 1/2 " seam and stitch on the outside edge to sew each piece to the middle block.

Repeat the process with the bottom block, in my case the plaid 24" and then again with the top block which is the remaining 6.5" block.

This finished piece is your quilt "top"!  

Be gathering your supplies for next week and we'll begin to quilt by machine.  You'll need batting in crib size or a remnant from a larger quilt.  Remember it will be bigger than our top to allow "grace".
We'll use Coats and Clark mercerized thread for the quilting on this project.  Always have extra machine needles handy--Schmetz 80/12  or 90/14 are good sizes for this project.  

Sew up a Storm!!
Renee


PS.All tutorials, information and images are the property of Renee Galloway at Ney Ney's Nest and are intended for personal use only.  Feel free to re-blog, pin, share with attribution to Ney Ney's Nest.  For all other purposes, please contact me at reneegalloway@me.com.  Thanks!

Tuesday, October 28, 2014

Baby Quilt Tutorial-Cutting It Up

Today's post is all about getting the fabric cut and ready to go!  I like to do all my cutting at one time, put the cut fabrics in their bag or tote (see Baby Quilt Tutorial-Organization) so I'm ready to sew when time allows.

My preferred method of cutting is with a rotary cutter, Omnigrid ruler and a self-healing mat.  Make sure your rotary cutter has a fresh blade so you can make precise, clean cuts.  I keep spares in my sewing cabinet (watch those coupons and save!)

I made my quilt 36x48.  It is sufficient to cover a crib (rarely ever done after baby gets here!) or to use as a floor mat or baby seat cover in cooler weather.  Both my children received quilts made by my aunt and we used them for all of the above and even as nap covers when they moved to their "big boy and big girl" beds!

I chose 3 fabrics for my quilt.  The plaid I chose to use as the "header" and "foot", the chevron as the back and decorative band, and the elephants as the feature fabric.
With the completed quilt, you see the crosswise grain goes left to right and length goes north to south.

Since fabric is 42-45" crosswise, I chose to make the crosswise grain my width. This also prevents any stretching or give in the pieces due to the weave of the fabric.  Initially I cut the whole length of the fabric and then cut to size later.  (this gives me lots of "grace" area for shifting layers later in the construction)

I then cut the length from the "length of yardage".  Since my quilt will be 48 " long, I need 1 3/8 yards.  (Again, I like "grace" so I usually get 2 yards.  Any scraps can be used later for appliqué or a scrap quilt)  Use your rotary cutter and omnigrid ruler to make a square cut by lining up the bottom of the ruler on the fold and cut at the 2 yard mark along the crosswise grain.


The next step is to cut the front pieces!   A note here in the event you chose a directional print like I did, you MUST pay attention to the print.  In my case, I made sure my cutting lines were along the design lines to prevent a "wonky" looking piece.
(Check out the above photo...look at the cutting line for my chevrons--the tip of each all the way across the width of the fabric, my plaid fabric is along the same "line" of plaid the whole length of fabric)

The "header" (plaid) = 6.5" x width of fabric (WOF)
       "footer"  (plaid)= 24"x WOF
        bands   (chevron)= 2 each of 3" x WOF
        main     (elephant)= 12.5 x WOF
        backing (mixture of plaid and chevron) 48 x WOF
         Since my quilt will be 48 " long, I need 1 3/8 yards.  (Again, I like "grace" so I usually get 2 yards)
         For this quilt, I wanted to add an extra strip of color, so I combined leftover fabric to make my 
         2 yards after sewing them together.
        4 yards of quilt binding to match ( you can make your own bias strips or purchase ready made)

 You will also need crib sized batting. There will be excess but that is the "grace" allowance I talked about earlier.  I prefer a scrimmed cotton batting.  Warm and Natural is my favorite brand, but others may be used.   It can be purchased online or at many sewing shops.

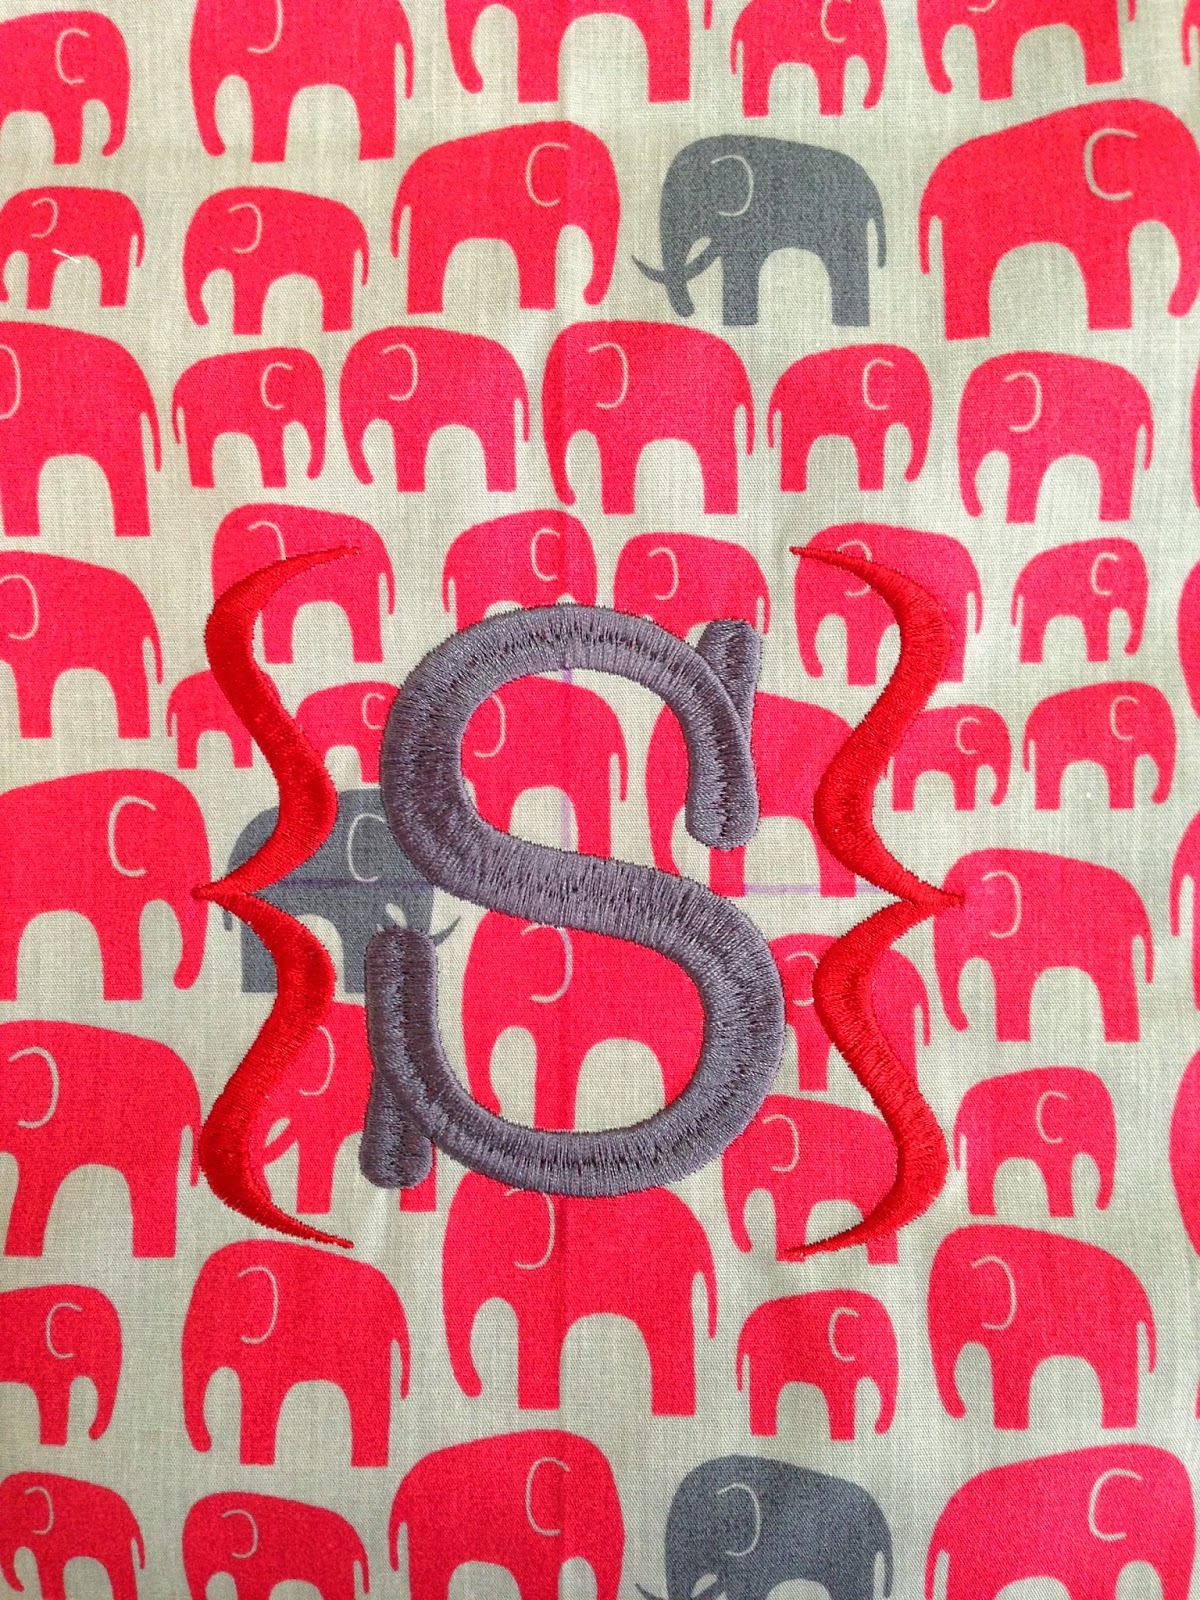
I chose to embroider an initial monogram onto my main fabric.  If you choose to embellish with any embroidery.  Do it now after centering it on your fabric pieces.

We'll sew in our next tutorial!

Cut carefully.....
Renee Galloway

PS.All tutorials, information and images are the property of Renee Galloway at Ney Ney's Nest and are intended for personal use only.  Feel free to re-blog, pin, share with attribution to Ney Ney's Nest.  For all other purposes, please contact me at reneegalloway@me.com.  Thanks!


Wednesday, February 12, 2014

Tree of Life-An Anita Good Design Quilt Project


My last post I shared pictures and commentary from my parent's 50th anniversary.  The gift that my
siblings and I gave them was the "Tree of LIfe" machine embroidered quilt by Anita Good Design.
Leaves can be added after completion that have been embroidered with names of the members in the family making a very personalized quilt.
This was my first attempt at a quilt done on the embroidery machine.  I fell in love with the process so I thought I'd share it with you.  
Of course proper prepping is key to success although it can be quite boring.  I use my rotary cutter to cut muslin to a size that will fit into my embroidery hoop then cut Floriani's No Show Mesh to a size that is 1" larger than my planned block size. (The program comes with 4 sizes and your machine will dictate which size you can use)  My Brother PR600II will only support the 7x7 block using the largest hoop.

Next I cut my background fabric for the quilt into 8x8 squares. (this is 1" larger than the proposed block size to provide seam allowances)  Then I cut stabilizer for these blocks.  I first used Dream Weave but ran out before finishing all 70 blocks.  I found a pellon stabilizer at a local craft store that was much cheaper and gave the body I needed for all the stitching plus it was much cheaper!!  I also cut batting to an 8x8 square.

Now...to stitch ALL those blocks! 


 Some required more time than others depending on the stitch count.  I numbered my template (provided in the tutorial) and wrote the corresponding number on a piece of painter's tape with a sharpie and stuck that on the edge of the hoop until embroidery was completed.  This helped me keep from turning the hoop upside down after trimming the applique.  Once the embroidery was completed, I moved the tape to the center of the block and trimmed it to the required 1/2" seam allowance.

As you can see from the picture, this process puts all the quilt layers together with the applique.  A muslin and stabilizer layer(here I used the stabilizer in a larger piece but learned that it was wasteful and could make it an inch larger than the proposed block), batting, background fabric with stabilizer and then the actual applique and stitching.  After getting all 70 blocks done, I laid them in the floor in their proper positions. (This is where the taped numbers are really handy-you know the position in the quilt as well as which direction it goes).
Next I stitch each block into rows by following the stitching lines done while in the hoop.  (Do you see the block I goofed on by actually cutting on the stitching line rather than giving a seam allowance?  Mistakes happen but things still come together...I'm not perfect)
Then I stitch the rows together!
Now to add the backing!  I chose to use yardage that matched my appliqued flowers.  Since it was only 45 " wide, I had to piece it to be wide enough to cover the quilt.  I also planned on using it as a foldover binding so made sure there was enough fabric around the edges to do this technique.  I laid the backing fabric WRONG SIDE UP on the floor and taped it down.  I used adhesive spray lightly and I added an extra layer of batting here to give more body to the quilt since I knew it was going to be a wall hanging.  Slowly roll the batting over the area you just sprayed.  Spray the batting layer and repeat with the rolled up quilt.  I also pinned my quilt (didn't want any slipping) on each block.


The hardest part was handling the quilt while "stitching in the ditch".  It was REALLY heavy!!  I think I want a legit sewing table that allows my machine throat plate to be level with the table or purchase a plexiglass table to fit around it.  I used a monofilament thread to do the stitch in the ditch.  Starting on one end of the quilt, with the ends rolled (as in the pic) I did all the vertical stitches.  Rerolled and then did all the horizontal.  Start in the center of the quilt and work your way to the right then from the center to the left to help keep the backing fabric smooth.  Your left shoulder can be a great prop as the quilt moves forward!!!!
After finishing the stitch-in-the-ditch, trim the backing to the required width for a double foldover, and trim the batting flush with the quilt blocks.  I also added a label to the back as well as loops for hanging.


The quilt was a hit!  Even got a few tears of joy and appreciation!
Looking great in my parent's house!
Happy stitching!
Renee