Showing posts with label Sewing. Show all posts

Thursday, April 6, 2017

Whoops! Copyright Woes

Be careful when posting pictures of someone elses' work, patterns, etc.  Always check first before posting...


Not realizing I had violated Cross-Eyed Cricket's copyright, posts dealing with picture smocking had to be removed.  I had used her "owls" smocking template to do a tutorial .  Although she praised the tutorial itself, she wasn't happy about using her template in my pictures and using the name even though I gave credit where credit was due. Based on what I had read, I thought posting the article was done correctly. She asked that in the future I got permission.  Rather than address the issue with a claim to Pinterest, she contacted me directly.  Although her email was polite, I felt like a child that had their hand slapped for wrong-doing, and removed the post.


A web article from Baylor University says, "Fair use allows limited use of copyrighted material without permission from the copyright holder for purposes such as criticism, parody, news reporting, research and scholarship, and teaching. There are four factors to consider when determining whether your use is a fair one.
The four fair use factors are as follows:
  1. The purpose and character of the use, including whether the use is of a commercial nature or is for nonprofit educational purposes;
  2. The nature of the copyrighted work, such as whether the work is fiction or non-fiction, published or unpublished;
  3. The amount of the work used in relation to the copyrighted work as a whole, such as using a poem in its entirety, or using one chapter from a long book;
  4. The effect of the use upon the potential market for the copyrighted work.   http://www.baylor.edu/copyright/index.php?id=56543

Whoops!
Still sewing in my happy place!
Renee


Tuesday, April 28, 2015

Spring Has Sprung

Spring has sprung....don't know if that is grammatically correct but I know the birds singing and all the "April showers" have been tremendous here in the south!

Creativity takes many forms....quilting, smocking, sewing, sketching, painting, music....these are a few of mine.  With the change of seasons, I find myself humming more, checking my bird feeders often and watching the flowers, grass and trees burst into all sorts of inspirational color!

(I recently painted this door wreath with a group of ladies at church for a Saturday morning "hen party")

What inspires you?  Is it all the glorious greens? What about the iridescent colors on a hummingbird?  Perhaps the gradient colors in a blooming flower?  

Do you take those spring cues and utilize them in your color palette? Try to audition fabrics for a new quilt?  What about floss colors in a smocking project?  

Spring has sprung.....what about your creativity? 

Springing right along,
Renee

P.S.All tutorials, information and images are the property of Renee Galloway at Ney Ney's Nest and are intended for personal use only.  Feel free to re-blog, pin, share with attribution to Ney Ney's Nest.  For all other purposes, please contact me at reneegalloway@me.com.  Thanks!

Tuesday, February 3, 2015

Carpal Tunnel Syndrome from Sewing

Carpal Tunnel Syndrome is most commonly caused by repetitive movements typically used when sewing, typing or using small tools, ie. rotary cutters, seam rippers.  Medical issues such as arthritis, menopause and thyroid conditions can also effect the tiny bones in the wrist that can squeeze the median nerve that runs through this "carpal tunnel" causing numbness, tingling and weakness in the hand and fingers and even cause pain to shoot up the arm and shoulder.
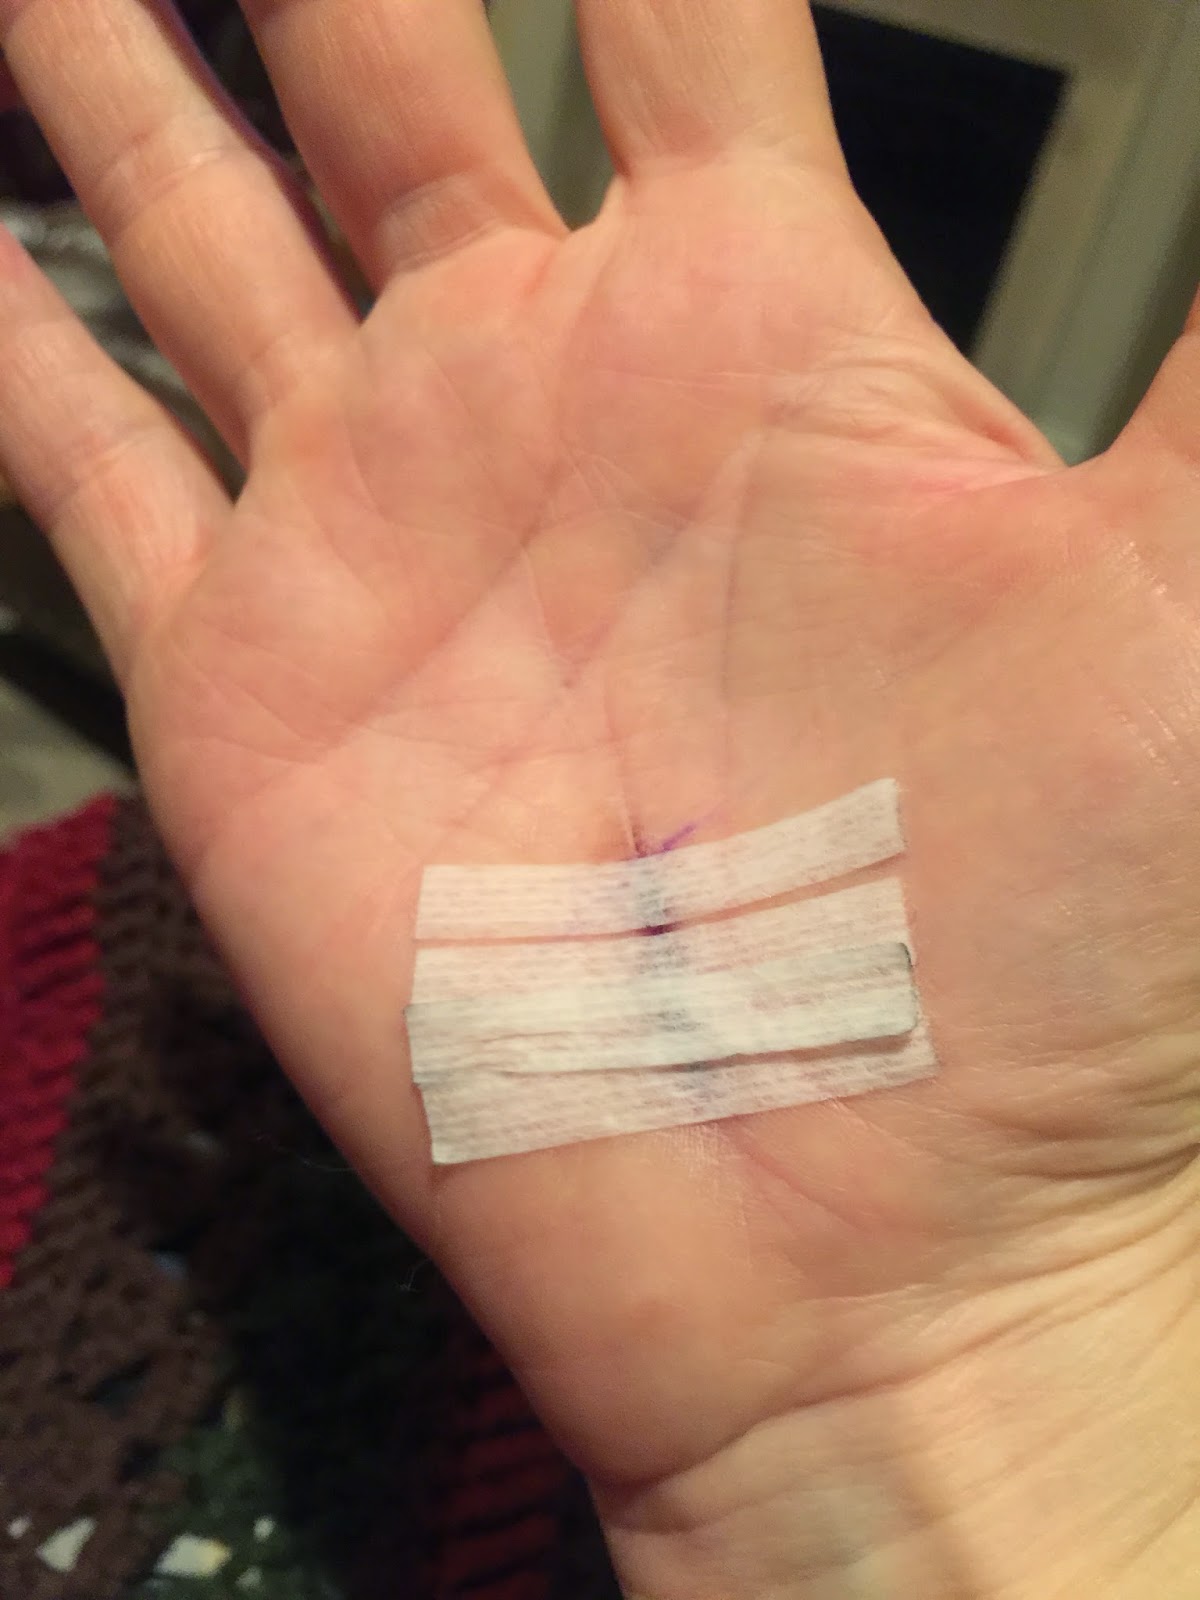
I first noticed tingling fingers after my chemotherapy for breast cancer and attributed it to residual neuropathy from the drugs used in my treatment.  Four years, more symptoms and several new doctors later, I'm recovering from Carpal Tunnel Release surgery as a result of severe Carpal Tunnel Syndrome.


Could I have prevented my condition?

Several precautions can be taken to reduce your risk for carpal tunnel syndrome.
       ~ Take breaks frequently while cutting, sewing by hand or using repetitive movements.
                      Good time to get a cup of java!!! or maybe walk the dog??
       ~Relaxing your hands with a cup of hot tea or coffee releases tension and can soothe strained
         muscles.
       ~ Stretch the fingers open wide.
         Rotate the wrists in clockwise and counter-clockwise circles.
       
         ~Wear wrist braces at night to allow the median nerve to flow freely through the carpal tunnel 
              without impingement.


         ~Practice sitting in ergonomic positions to receive any pressure you may be adding to your
           wrists.
    
  • It's VERY important to invest in a good chair that will allow you to sit comfortably with your shoulders and hips lined up, elbows and wrists in a straight line along with feet and knees being at a 45 degree angle.  Just ask me how I know!!!!
    I recently purchased a new Koala chair from The Sewing Room that has made worlds of difference in how my back, neck and shoulders feel after sewing.
    So anxious to get back to my machine and new (ergonomically correct) rotary cutter!!
    Are there any other stitchers, seamstresses with recommendations for great tools to aid our sewing?  What about sewing furniture or chairs?  Do you have favorite tools?

    Literally in "stitches" (ha-ha),
    Renee
    P.S.All tutorials, information and images are the property of Renee Galloway at Ney Ney's Nest and are intended for personal use only.  Feel free to re-blog, pin, share with attribution to Ney Ney's Nest.  For all other purposes, please contact me at reneegalloway@me.com.  Thanks!

Friday, December 19, 2014

Stockings Were Hung...

It is a tradition at my house to hang a stocking representative of the owner's personality. Hubby has wrangler jeans with a pocket, son has camo style hunting boot, etc. I needed to add one suitable for that "techy" guy that always, even at his young age, seemed older than his age. 
The perfect solution was to recycle one of my husband's dress shirts that was headed for the discard pile.  A little embroidery on the collar, a new "bow tie" from my stash of Christmas fabric 
, recycling the cuff for a loop and a pen in the pocket suited his personality perfectly!

What are some of your Christmas traditions? 
Homemade stockings? Pj's?

Now to contact Santa to make sure he knows to fill ALL these stockings hanging from my mantle!

Merry Christmas!
Renee 

Monday, September 8, 2014

Pillowcase Dresses and Football

Pillowcase dresses are all the rage for little girls, so creating them for football fans seemed natural.  

The appliqué and monogram  took longer than the whole dress construction process!  I It was done first on the block of fabric to be used as the largest portion of the dress.  While it was being monogrammed, I cut the two bottom bands to the same width of the main body and folded them in half and ironed them so I had a finished bottom edge on both.  Note that the first band (the paw prints) is smaller in width than the bottom band (polk a dot) so that it creates two layers of folded finished edges.  
After the applique was completed, I made a sandwich of the main fabric (chevron in this case) RS up, the paw print band next with raw edges together on bottom of chevron, then last I put the polk a dot band on top with raw edges together.  Then I serged all three together at the same time! I did this for the front and back pieces.

Then fold the seam toward the top and press.  (The bands should line up, from this angle it looks like they are not, but they are!) The side seams are sewn on the machine AFTER serging the sides and top of the front and back pieces as a FINISHING seam. DO NOT SERGE THE SIDE SEAMS or there will be no place for little arms!!!!
Measure down from the top (in my case for a 12 mo size it was 7inches) .  Machine stitch the sides from your mark down to the hem.  
Iron the remaining(armhole) seam the same width as the side seam and topstitch. Serge across the top (neckline) to finish the raw edge. Then iron the top neckline down 1.5 inches for the casing.  Add a cute ribbon and viola!  A cute pillowcase dress!!

War Eagle and Happy Stitching!
Renee

PS…All tutorials, information and images are the property of Renee Galloway at Ney Ney's Nest and are intended for personal use only.  Feel free to re-blog, pin, share with attribution to Ney Ney's Nest.  For all other purposes, please contact me at reneegalloway@me.com.  Thanks!


Monday, April 14, 2014

"Spring Smock-Along"-Picture Smocking Part 1

PICTURE SMOCKING TUTORIAL PART 1 Blocking
Spring brings not only flowers outdoors, but a desire to sew and smock all kinds of cute clothing!
I'm re-posting my series on smocking tutorials since I have changed blogging platforms and many of my links take you to ......nothing!!!  Now, you should be able to find the tutorials!!!!

Recently I have seen picture smocking on many facebook style auctions.  You know the ones I'm talking about?  Picture smocking requires "stacking" cable stitches to create a picture.  Since I loved to color as a child (you may still catch me coloring) picture smocking affords me to "color" with  thread.

Picture smocking can be done on bishops (around the neck and shoulders)


or an insert (inset) that is placed into a garment.


To begin, select one of many picture smocking "plates" (short for template) available from many designers, available online or from specialty sewing stores.


Then have your 100% cotton fabric pleated with the number of rows required for your intended project.  I prefer the stability of broadcloth for picture smocking.

PICTURE PER REQUEST OF SMOCKING DESIGNER

For my  selection, I need 9 rows of gathering threads pleated.  Always make sure you have a "holding row" at the top and bottom of your insert.  Then you have the actual rows that make the picture smocking.  My pattern has an "H" for holding on the very top row and the row 9 serves as the second "holding row".

PICTURE REMOVED PER REQUEST OF SMOCKING DESIGNER


"Blocking" your insert is required prior to smocking to insure the piece will fit into your garment correctly!  You don't want to spend the time it takes to smock only to discover the insert has been squeezed tightly by your stitches and is too little to be sewn into your garment.:(


Next, scrunch all the pleats over to the left hand side (make sure there is a knot holding all the threads together)  pulling on the top and bottom of the insert to "straighten" any puckers.  Hold your steam iron over the insert and steam the pleats.  DO NOT IRON THE PLEATS!!!  Let this dry.


You need to make sure you're smocking on the "right" side of the insert.  Since broadcloth is essentially the same on both sides this doesn't create a problem with the fabric.  However, there is a "right" and "wrong" side to the pleating.  In order to stitch into each pleat while smocking you want as much of the pleat to be above the gathering thread as possible.  So....look at both sides of your insert.  The stitches that are longest are on the wrong side.  "Wrong is Long"  Notice that on the pleats, there is little room to take a "bite" of fabric with your needle while smocking.


Notice here that the stitches are shorter and therefore, this is the "right" side.  The pleats give you more room to take a stitch when pulled together.


After the insert is completely dry, you are ready to pull the gathering threads from the left side away from the fabric and snip off the knot.


I use the blocking board that can be purchased from Martha Pullen's website.  When I first started smocking, however, I used a bulletin board that had been covered with muslin and a grid that had been covered with contact paper.


Make sure to line up the left edge of the fabric so that it is square.  Secure with several pins.

Stretch the pleats out from the left side.


Measure the seam allowance.  My particular garment pattern requires 1 3/4 inch seam allowance in order for the insert to fit into the clothing I'm planning on making.  So I use a seam guide to find that width and notice which pleat lines up with that required 1 3/4 inch allowance.


Using a straight pin, (I've also used a seam ripper only to break my gathering threads so I don't suggest this method :( pull each row out gently along the same pleat all the way down the left side.  It should look like this....


Now you will take 2 of the tails and tie and overhand knot.


Using your right hand on the right side of the fabric, gently pull the top two gathering threads through the fabric until the first knot is "seated" right against the left first pleat.


This is a properly "seated" knot.  :)  Continue all the way down the left side.  If you have an odd number of rows (as I do in this particular design) just tie the last 3 together.  (When I pleat my inserts, I use one color-pink in this case- for the top holding row, all the smocked rows are orange and the bottom holding row is blue to help me while picture smocking)


Now it is time to count the pleats.  I use one color of (white) pins across the top of my insert and count out 10 pleats at a time and mark them with my pins.


Write this number down or put it into your handy cell phone calculator!

Look at your template to make sure you have enough pleats to cover the smocking design.

PICTURE REMOVED PER REQUEST OF SMOCKING DESIGNER


This particular design calls for a total of 162 pleats.  I have more than enough to cover that!  (I will use only the amount required since I'm making a small 6 mos size garment, if I make something bigger I like to leave extra pleats on each side to cover a larger chest area)

After dividing 162 pleats by 2 I get 81 which is the center of my smocking design.  So now I recount the white pins by 10's until I get to 80 then add the 1 pleat and mark it with a blue pin.  Take a safety pin and secure it on the center pleat.

  Determine the width your insert needs to be by consulting the pattern.  The pattern I'm using has a "blocking guide" to give me the width the insert needs to be to fit into the garment properly.


My project needs to be 12inches wide so I'll stretch out the right side of the insert on my board to the 12 inch mark.  Make sure that the edges are square and pin into place.


Repeat the measuring process used with the left side to determine where to pull out your gathering threads so you can tie off the right side. Since my project requires 162 pleats total, I'm going to be sure I have 81 pleats from center to right side in order to have enough pleats for my design. Do the same for your required number of pleats, depending on which smocking template you selected.   (As mentioned before, if you have extra on BOTH sides for a larger insert, it is ok unless it is too big for the blocking guide so refer to your pattern)  Again, I will use the 1 3/4 " seam allowance called for in my pattern.


Repeat the process for pulling out the threads up to the pleat at the end of your measurement.  Use a pin and go down the entire length of the pleat pulling out the gathering threads.
(see above pic like we did on the left side)

 Now remove all the white pins across the top of the insert and mark the center pleat top and bottom with a water soluble fabric pen.  Slide the pleats over gently using your fingernails or a wide toothed comb.  (Be careful if you have colored nail polish on!) Put your marked center of the insert in the middle of your measurement.  In my case 12 inches wide divided in half is 6, so I put my safety pinned center pleat on 6 inches.


Pin the insert at the top and bottom, making sure the center pleat is straight and squared.  Continue to adjust the pleats from the left side to the center .

Now it is time to tie off the right side.  I take a pin and secure it to the right side of the last pleat required for my design in between the first two gathering rows.  On the right side I tie a square knot using the pin for leverage to make sure I get the knot "seated" securely on the right side of that last pleat.


Continue down the right side in two's, remembering to tie an odd number of rows by using the tail of the gathering row above it.


I promise we are almost through!  Now give the gathering threads a "haircut" to about an inch within the knots on both sides.


The last step in the blocking process is to adjust the pleats with your fingernails getting them straight and no puckers, then spray starch the insert while it is still pinned to the board.

Let it dry completely and then you'll be ready to smock!
Join me on a  Spring Smock-along ---Part 2 coming next!
UPDATE:  PART 2:
https://neyneysnest.blogspot.com/2015/03/picture-smocking-tutorial-part-2.html

Smooth Smocking,

Renee
😉--updated 6/28/17 without the use of pictures using a particular smocking design that was removed at the request of the smocking designer.  Please comment if you have questions and I'll try to help!

Thursday, January 16, 2014

Gingher Gifted

I recently was told to meet a particular lady outside after worship services, she had a gift for me.  She didn't know anything about sewing or the "tools" required but knew that this gift was well taken care of...

Her mother had passed away a few years ago and while going through her things had kept her  Gingher pinking shears, that were in the original box! I know her mother was a quilter and these shears must have been well loved and had many miles of fabric cut by their edges.  What a precious gift!!!!

It means so much to me to have them to continue the mileage and memories that can be made with sewing notions.  I have a jar of my grandmother's buttons, I still have all the patterns I used to make my daughter's dresses 20 something years ago as well as the Gingher appliqué scissors and shears I used to cut all her fabrics.  I have added several other Gingher scissors to my collection recently and know that they, too, will give me many miles of sewing pleasure.

Gingher PInking Shears

What is your favorite pair of scissors?  What brand do you use?

Happy Stitches,

Renee

Wednesday, December 18, 2013

Fired Up!

Typically this time of year you have to be "fired up" to get everything done...this week I have literally be "fired up"!

As I approached my studio Monday afternoon, I smelled smoke but thought maybe the neighbors were burning trash. As I opened the sliding glass door to enter, I saw SMOKE! Thank goodness hubby dear was working at home so after a panicked run back to the house to get him, we quickly shut everything off in the fuse panel and I started grabbing projects needed for Christmas orders! I called 911 and my neighbor (so she wouldn't freak out) and then she arrived and suggested we start pulling fabric outside. Ignoring the dispatcher's advice to stay out of the building, we pulled "big mama" (my Brother 600 PR) and the other 3 machines outside. Then with another panicked thought, I grabbed my smocking templates notebook and started to retrieve all my Australian Smocking magazines before my husband stopped me when the fire chief arrived. After finding no hot spots (they used this machine to do this, was interesting to watch) he suggested I call an electrician. My sweet neighbor and dear hubby helped carry all the machines and fabric inside the house. Husband took down the twin beds in the guest room (they only had box springs anyway, the mattresses went to the duck camp) and temporarily set me up to work on my projects in the guest room.

save the Australian Smocking!
The next morning electrician declared the window heat/air unit the culprit. (I was concerned that I had too many machines plugged into the same outlet/s. Although I use serge protecters on each outlet I use a lot of electricity between the coffee pot, radio, iron and typically 3 machines going at a time.) Today dear hubby has already bought and replaced the window unit. Did you know bowls of vinegar will remove odor? Thanks sweet neighbor for that suggestion!

Hopefully will move back in the studio on Saturday and regain the momentum lost this week! Check your plugs....don't have too many things in one outlet, especially with all the Christmas sewing done this time of year. I've literally been "fired up"! Hoping all your Christmas projects are going smoothly!

Merry Stitching!
Renee

Sunday, August 25, 2013

Tea Staining for a Vintage Look

I am working on a custom order for a Christening gown and the trims the client selected only came in white so I did a little research and decided to give tea staining a whirl......


Tea staining result

I think it turned out beautifully!!!!  The before and after makeover :)

First I started with a HUGE pot. (This is my jambalaya pot but it is also good for this project!)  I filled it 1/3 of the way with water and added 12 tea bags and set it on the stove to heat to just before boiling. I didn't let it boil because I didn't want the tea bags to burst and have tea granules in my water.

DSC_0082


While this heated, I took a large, plastic bowl and filled it partially with water and a couple of Tablespoons of white vinegar.  (I didn't measure precisely, just a splash or two:))

DSC_0083


Lay a towel out to absorb the liquid without "wadding" your trim or fabric. Get a pair of tongs and you are ready to begin.

I tested a small piece of each of my trims prior to dumping the whole lot of it into my tea.  In my case I had Swiss insertion, edging and entredeaux. I set the timer on the stove originally to 2 minutes and checked it to see if it was the right shade after drying it.  It wasn't so I dunked it again and left it for longer.  Turns out 3 minutes did the trick for my particular shade this time.

DSC_0084


I also decided I needed a larger, more absorbent towel so I grabbed a bath towel for the next dunking.

A little scary dropping 5 yards each of that expensive trim into a pot of tea.....

DSC_0087


A little gentle stirring to ensure all parts of the trim were covered,

DSC_0089and then I removed it from the tea and doused it into my bowl of water/vinegar solution to set the "stain".  (Amusing since usually I'm trying to get the stain out....sorry no pic on this step)  I let it sit about 5 minutes before moving it to the towel to blot it gently.

Blot gently


I then painstakingly ironed it while wet to further set the color and make sure after it dried it was still the color I needed and didn't need redoing.

DSC_0092I cut a piece of leftover foam board and began to wrap the trim around it as I ironed so it didn't wrinkle from pooling on the floor while I worked with the wet end. (ugh...my ironing board looks terrible;/ might be time for a new one!)


DSC_0093It took very little time to do all three trims, most of it was spent ironing, but now I'm ready to begin the project!

Tea Staining with fabric